Page Content
Step 1:
In the address bar of a web browser (e.g., Google Chrome, Microsoft Edge or Mozilla Firefox), enter
selfsrv.dcccd.edu/student.
Step 2:
On Self-Service Sign In page, click in User name, and then type your e7. Click in Password, and then type your Dallas College student password. Click Sign in.

Step 3:
On Self-Service Welcome page, click Student Planning.

Step 4:
On Steps to Getting Started page, click Go to Plan & Schedule.

Step 5:
On Plan your Degree and Schedule your courses page, scroll through the list of courses until you find the course you want to drop, and then click Drop.

Step 6:
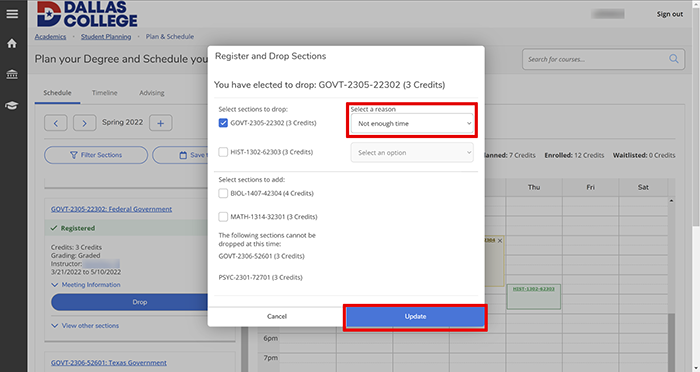
On Register and Drop Sections pop-up, verify the correct checkboxes are checked for the class(es) you wish to drop. Click Select a reason drop-down and select the reason. Click Update.
